

Don't Call a Pro Yet: Easy DIY Fixes for Your Home's Little Annoyances


Why Exhaust Fan Issues Affect Every Homeowner
Exhaust fan repair is one of those household tasks that can seem intimidating, but many common problems have surprisingly simple fixes. Whether you're dealing with a noisy bathroom fan that sounds like a freight train or a kitchen exhaust that barely moves air, these issues are more than just minor annoyances.
Common exhaust fan problems homeowners face:
- Noisy operation - grinding, rattling, or humming sounds
- Poor ventilation - steam not clearing, weak airflow
- Electrical issues - fan won't turn on or runs intermittently
- Visible buildup - dust, grime, and debris accumulation
- Vibrations - loose components causing movement
Your home's exhaust fans play a crucial role in maintaining healthy indoor air quality. They remove moisture from bathrooms, eliminate cooking odors from kitchens, and prevent the buildup of harmful pollutants. When these systems malfunction, the effects ripple through your entire living space.
Without proper ventilation, you'll likely experience:
- Foggy mirrors that won't clear
- Lingering odors throughout the house
- Mold and mildew growth
- Peeling paint and wallpaper
- Higher humidity levels
Research shows that bathroom fans typically last 5 to 10 years, but poor maintenance can shorten their lifespan significantly. The good news? Many exhaust fan problems stem from simple issues like dust buildup, loose screws, or clogged airways - all things you can address yourself.
Before you call a professional, there are several DIY fixes that can restore your exhaust fan's performance and save you money. With basic tools and a safety-first approach, you can tackle the most common exhaust fan repairs in under an hour.

Is Your Exhaust Fan Crying for Help? Common Signs and Symptoms
Picture this: you're enjoying a hot shower, but when you step out, the bathroom feels like a sauna and the mirror is completely fogged up. Or maybe you're cooking dinner and notice that grinding noise coming from the kitchen exhaust fan has gotten so loud it's drowning out your favorite cooking show. Sound familiar?

These everyday annoyances are actually your exhaust fan's way of asking for help. Learning to recognize these warning signs early can save you from bigger headaches down the road and help you determine whether you need a simple cleaning or more involved exhaust fan repair.
Unusual noises are often the first red flag homeowners notice. A healthy exhaust fan should hum quietly in the background - think about the gentle sound of a refrigerator. But when your fan starts grinding, rattling, or humming loudly enough to interrupt conversations, something's definitely wrong. These sounds usually mean dust has built up around the motor, the fan blades are hitting something they shouldn't, or internal parts are wearing out.
The most telling sign of trouble is weak or no suction. Here's a simple test: turn on your fan and hold a piece of tissue paper near the grille. If it doesn't get pulled toward the fan, you've got a problem. When steam doesn't clear from your bathroom or cooking odors linger in the kitchen, your fan isn't doing its job of moving air effectively.
Electrical issues can be particularly frustrating. Maybe your fan won't turn on at all, or it works fine one day and refuses to start the next. This intermittent power problem often points to loose connections, a faulty wall switch, or a motor that's overheating and shutting itself off as a safety measure.
Don't overlook the obvious signs either. Take a moment to actually look at your fan - is there visible dust and grime buildup coating the grille? This isn't just an eyesore; it's like trying to breathe through a clogged straw. The fan has to work much harder to pull air through all that debris, which can lead to motor burnout.
Finally, pay attention to vibrations. If your ceiling fan is shaking or wobbling when it runs, loose screws or an unbalanced motor could be the culprit. Left unchecked, these vibrations can damage both the fan and your ceiling.
Recognizing these signs early means you can often fix the problem with some basic maintenance before it turns into a major repair job. Your ventilation system works hard to keep your home comfortable and healthy - a little attention when it starts crying for help goes a long way.
Your Step-by-Step Guide to DIY Exhaust Fan Repair
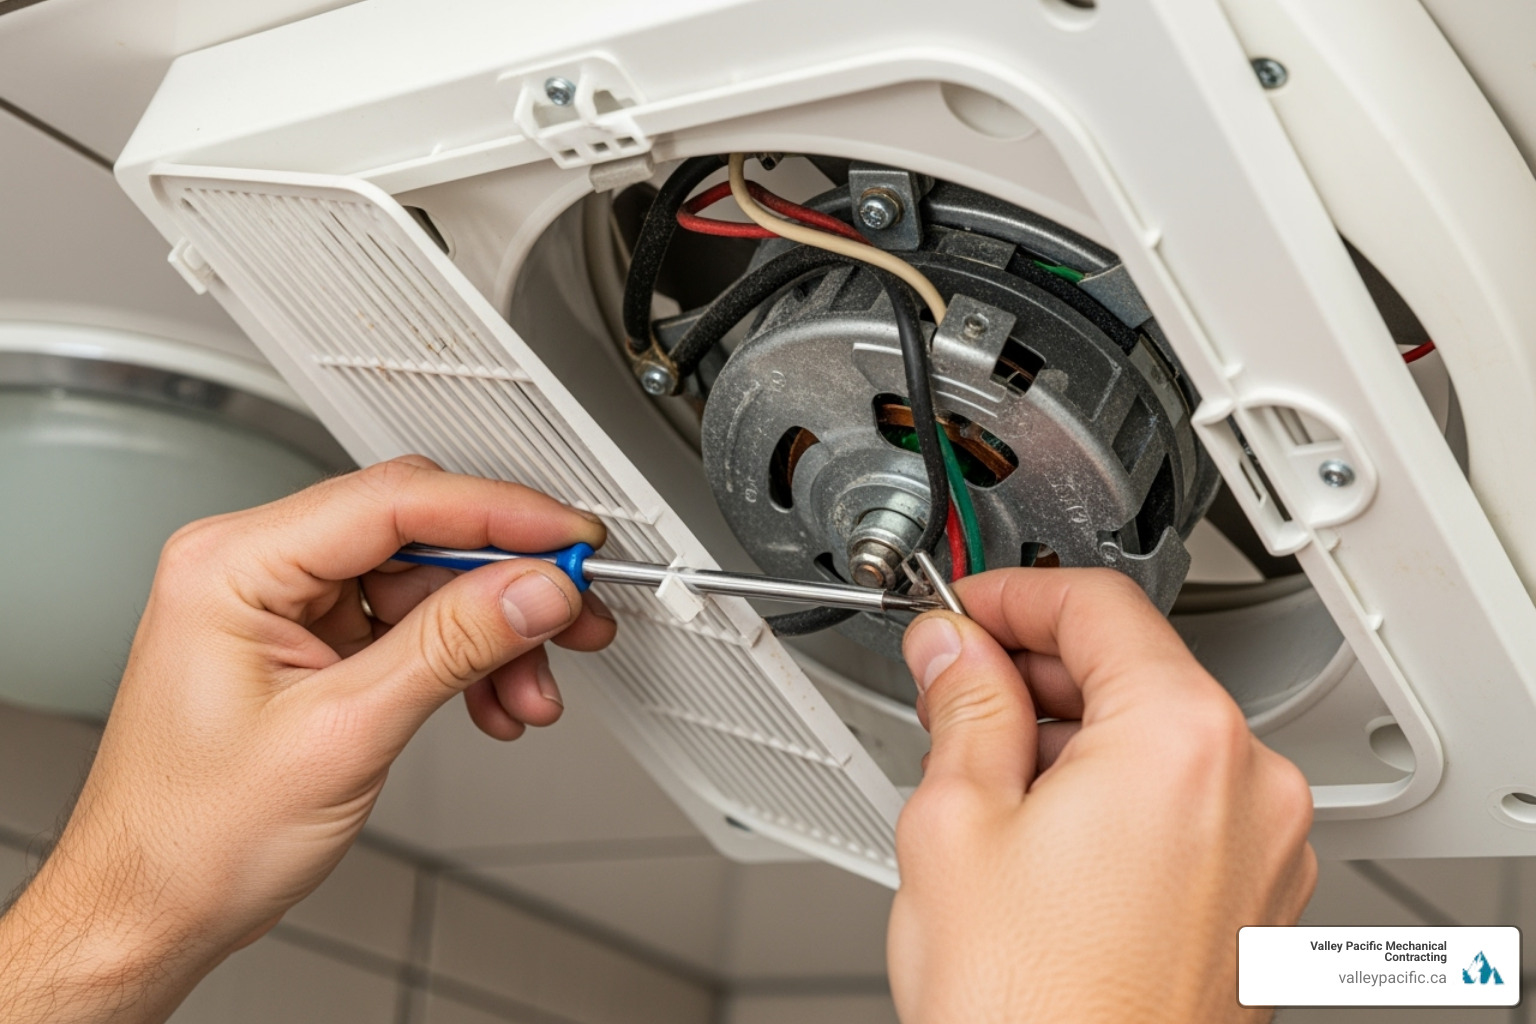
When it comes to exhaust fan repair, there's one rule that trumps all others: safety first. I can't stress this enough – working with electrical appliances requires respect for the power flowing through your home's wiring. Before you even think about touching that fan, we need to cut the power completely.
Head over to your electrical panel (you'll usually find it tucked away in the basement, utility room, or garage). Look for the circuit breaker that controls your fan – it might be labeled "bathroom," "kitchen," or simply match the room you're working in. Flip that switch to the "off" position, then double-check by trying the fan switch in the room. No hum, no movement? Perfect! You're ready to work safely.

The beauty of most exhaust fan repair projects is that they don't require a toolbox full of expensive equipment. You probably already have everything you need: a screwdriver (Phillips head works for most fans), a vacuum with a brush attachment for tackling dust buildup, some soft cloths, and mild soap for cleaning. Throw in some work gloves and safety glasses, and you're equipped to handle the majority of fan problems.
Tackling a Noisy Fan: The Cleaning and Tightening Fix
That grinding, rattling symphony coming from your ceiling? Nine times out of ten, it's simply a cry for cleaning. Dust, lint, and kitchen grease love to accumulate on fan components, throwing everything off balance and creating those annoying noises.
Start by removing the fan cover – most are held by spring clips that you can gently pull down, or a few screws that are easy to spot. Take that cover to the sink and give it a proper wash with mild soap and water. You'll be amazed at what comes off!
Now for the satisfying part: cleaning the fan blades and blower wheel. Use your vacuum's brush attachment to gently remove all that accumulated grime from the blades and motor housing. The blower wheel (that squirrel-cage looking component) deserves special attention – those little fins between the cage can harbor surprising amounts of dust that seriously impacts airflow. A soft brush or cloth with mild soapy water works wonders here.
While you're in there, check for loose components by gently wiggling the fan blades and motor assembly. Any movement means loose screws that need tightening. It's remarkable how much quieter a fan becomes when everything is properly secured and clean.
Simple electrical exhaust fan repair: When the Fan is Dead
A completely silent fan often points to an electrical hiccup, but don't panic – many of these issues have surprisingly simple solutions. We're working with the power off, so take your time and be methodical.
Start by checking the wall switch. Does it feel loose or fail to click properly? A faulty switch is more common than you'd think. If the switch seems fine, move on to inspecting the motor itself. Look for obvious signs of trouble: burn marks, melted wires, or that distinctive electrical burning smell. If you spot any of these, it's time to call in the professionals.
Many motors have a thermal overload protector – a small button (often red) that pops out when the motor gets too hot. If you see one that's popped out, try pushing it back in to reset it. Sometimes that's all it takes!
Finally, verify that electrical connections are secure. Vibrations and age can loosen wire connections over time. Gently check that all wires are properly connected and terminal screws are snug. It's amazing how often a loose connection is the culprit behind a "dead" fan.
Boosting Performance: A guide to exhaust fan repair for weak suction
A fan that spins but barely moves air is like having a car with a clogged air filter – it's working hard but not accomplishing much. Weak suction usually means something is blocking the airflow path, and clearing these blockages can dramatically improve performance.

Deep cleaning the fan housing and motor goes beyond just the visible parts. Use your vacuum's crevice tool to reach every corner of the housing, paying special attention to the area around the motor and the duct opening. Kitchen fans often accumulate significant grease buildup that can be carefully scraped away before wiping with a degreasing cleaner.
Next, check for blockages in the duct opening where air enters the ductwork leading outside. Bird nests, excessive lint, or other debris can seriously restrict airflow. If you can safely reach any visible blockages, remove them carefully. For deeper obstructions within the duct run itself, professional help might be needed.
Don't forget the backdraft damper – that small flap designed to open when the fan runs and close when it's off. This damper can stick shut due to dust, rust, or broken hinges, severely limiting airflow. It should swing open easily when pushed. If it's jammed, cleaning the hinges or removing built-up debris usually solves the problem.
By ensuring a clear path from the fan grille all the way to the exterior vent, you'll restore your exhaust fan's ability to effectively remove moisture and odors while reducing strain on the motor.
Repair or Replace? Making the Smart Choice
So you've rolled up your sleeves, tackled the cleaning, tightened those screws, and maybe even reset a thermal switch or two. But your exhaust fan is still giving you grief. Or perhaps you're staring up at a fan that's been faithfully (if noisily) serving your family for over a decade, wondering if it's time to say goodbye. This is where the rubber meets the road in exhaust fan repair decisions.
The truth is, sometimes the kindest thing you can do for both your wallet and your sanity is to let that old fan retire gracefully. But how do you know when you've crossed that line from "fixable" to "replaceable"?
Age is often the biggest tell-tale sign. Most bathroom and kitchen exhaust fans have a lifespan of about 5 to 10 years, depending on how hard they've been working and how well they've been maintained. If your fan is pushing past that decade mark, even a successful repair might just be buying you a few more months of peace before the next breakdown.
Frequent breakdowns are another red flag. Are you finding yourself up on that stepladder every few months, cleaning, adjusting, or coaxing your fan back to life? That's your fan's way of telling you it's ready for retirement. As one industry expert puts it, "a brand-new fan is sure to satisfy, while the old fan, even when repaired, is unlikely to" deliver the performance you really need.
Let's talk numbers for a moment, because performance metrics matter more than you might think. Your fan's airflow capacity is measured in CFM (Cubic Feet per Minute), and if your current fan isn't moving enough air, no amount of cleaning will fix that fundamental shortcoming. Ontario's building codes require at least 50 CFM for each toilet, urinal, or shower in a bathroom, while kitchens need a minimum of 100 CFM. The Home Ventilation Institute suggests 1 to 1.5 CFM per square foot of bathroom floor space for optimal performance.
Then there's the noise factor, measured in sones. If your fan sounds like it's preparing for takeoff every time you flip the switch, you're probably dealing with an older model that was chosen more for price than performance. Here's something that might surprise you: modern bathroom fans can be three times more powerful than older models while being three times quieter! While building codes allow up to 3.5 sones, most homeowners find that fans rated at 1 to 2 sones provide blissfully quiet operation.
Upgrading to modern, energy-efficient models brings benefits that go far beyond just quieter operation. Today's fans are smarter, more durable, and often include features like humidity sensors, timers, and LED lighting. They're designed to move more air while using less energy, which means better ventilation and lower utility bills.
| Consideration | DIY Repair | Professional Replacement |
|---|---|---|
| Best for | Fans under 7 years with minor issues | Fans over 10 years or frequent problems |
| Time investment | Quick fixes (under an hour) | Professional installation (few hours) |
| Performance gain | Restores original function | Significant improvement in airflow and quiet operation |
| Long-term value | Good for extending current lifespan | Excellent for major upgrades and reliability |
Visible damage to the fan housing - cracks, rust, or water damage - usually signals that you're beyond simple exhaust fan repair territory. These issues often indicate deeper problems that cleaning and tightening won't solve.
The bottom line? If your fan is young and just needs some TLC, those DIY fixes we covered earlier can work wonders. But if you're dealing with an older fan that's become a regular maintenance headache, or if you're craving the quiet efficiency of modern technology, replacement often delivers better long-term value than repeatedly patching up an aging system.
Proactive Care: How to Prevent Future Fan Failures
We've covered how to bring a struggling exhaust fan back to life, but what about keeping it happy and healthy in the long run? Just like any other appliance in your home, a little preventative maintenance goes a long way. Proactive care is the best exhaust fan repair strategy because it helps you avoid issues before they even start!

Think of your exhaust fan like a trusted friend who works tirelessly behind the scenes. A little attention now and then keeps that friendship strong and prevents those awkward moments when they suddenly stop working in the middle of your morning shower.
The cornerstone of preventative maintenance is establishing a regular cleaning schedule. Mark your calendar for every 6-12 months – it's honestly that simple. This routine maintenance will help prevent dust buildup on the grille, blades, and most importantly, the blower wheel. A clean fan moves air more efficiently, puts less strain on its motor, and operates much more quietly. It's amazing how much difference a simple cleaning can make!
Listen for new noises as you go about your daily routine. Your fan has its own "normal" sound, and you'll quickly notice when something changes. Those new squeaks, rattles, or unusual hums aren't just annoying – they're your fan's way of asking for help. Addressing a minor noise early (like tightening a loose screw or clearing some dust) can prevent it from turning into a major headache later.
Proper usage makes all the difference in your fan's lifespan. In bathrooms, run the fan during your shower and for at least 15-20 minutes afterward. This gives your fan enough time to clear all that humidity from the room, preventing mold and mildew from setting up shop. For kitchen fans, flip that switch whenever you're cooking, especially when there's steam, smoke, or strong odors involved. Don't be shy about using it – that's what it's there for!
Here's something many homeowners forget: checking the exterior vent cap for blockages. Your exhaust fan works hard to push air outside through a cap on your roof or exterior wall. Over time, these caps can get clogged with lint, leaves, or even become home to unwanted guests. Rodents are responsible for more than 25% of HVAC system failures in Canada, so a yearly inspection of your exterior vent can save you from bigger problems down the road.
By weaving these simple preventative maintenance tips into your home care routine, you're setting yourself up for years of reliable performance. Your exhaust fan will continue providing the fresh air and healthy environment your home deserves, and you'll avoid those surprise repair moments that always seem to happen at the worst possible times.
Conclusion: Your Home, Healthier and Happier
Congratulations! You've just learned how to tackle the most common exhaust fan repair challenges that homeowners face. By taking on these DIY fixes yourself, you're not just saving money on service calls – you're also taking control of your home's health and comfort.
Think about it: a properly functioning exhaust fan is like having a silent guardian working around the clock. It whisks away moisture before it can settle into your walls, eliminates cooking odors before they permeate your furniture, and keeps your indoor air fresh and breathable. When you fix that noisy, struggling fan, you're directly improving your home environment in ways that benefit your entire family.
The satisfaction of hearing your bathroom fan purr quietly again, or watching steam clear from your mirror in minutes instead of hours, is genuinely rewarding. Plus, you now have the knowledge to spot early warning signs and prevent small issues from becoming big, expensive problems.
However, we want to emphasize the importance of knowing your limits. While cleaning a dusty fan or tightening loose screws is well within most homeowners' capabilities, some situations definitely call for professional expertise. When professional help is necessary includes complex electrical issues beyond a simple switch replacement, motor replacements, persistent ductwork problems, or any time you feel uncertain about the safety of a repair.
At Valley Pacific Mechanical Contracting, we've been helping Lower Mainland homeowners create healthier, more comfortable living spaces for over 30 years. We understand that your home is your sanctuary, and every component – from the smallest exhaust fan to your entire HVAC system – plays a role in keeping it that way.
Whether you're in Mission, Maple Ridge, Langley, Pitt Meadows, or Coquitlam, our team is ready to step in when DIY reaches its limits. We pride ourselves on providing that 'headache-free' experience, and our 24/7 emergency service means we're there when unexpected issues arise.
Your journey toward better home comfort doesn't have to stop with exhaust fan repair. For comprehensive home comfort solutions, explore our heat pump services in Langley, BC. After all, your home deserves to be a place where you can breathe easy and feel completely comfortable.


