


Replacing a Shower Valve Without Tearing Down Your Bathroom Wall


The Myth of the Mandatory Tile Smash
It is a widespread misconception that replacing a shower valve without tearing down your bathroom wall is an impossible feat. If you have a failing, leaking, or completely seized shower valve in a beautifully finished bathroom, you are likely dreading the immediate future. The sinking feeling usually begins the moment you realize the repair might involve destroying expensive custom tile that took weeks to install and cost a small fortune. At Valley Pacific Mechanical, our team frequently speaks with homeowners who have received quotes that default to a destructive "smash and patch" approach. These quotes make it seem like shattering your shower wall is simply a mandatory part of plumbing repair.
For homeowners looking to protect their investment, choosing a team that provides professional plumbing and HVAC services is the first step toward a seamless repair. The truth is, preserving your bathroom's aesthetic and structural integrity is the mark of a true professional. There is a distinct decision point every homeowner faces when a shower valve fails: accepting a destructive quote because it seems like the only option, or seeking out our experienced professionals who utilize non-destructive methods.
The True Cost of Demolition
When a contractor tells you they need to break through the tile from the front without using specialized access plates, they are prioritizing their own speed and convenience over your home's finish. The immediate panic of a failing valve often pressures homeowners into agreeing to this demolition. However, the cost of the plumbing repair is usually dwarfed by the subsequent costs of hiring a tile setter, attempting to source matching tile that may have been discontinued years ago, and paying for drywall and waterproofing repairs. By understanding that non-destructive methods exist, you can make an informed decision that saves your bathroom's design and your renovation budget.
Why Preserving Shower Waterproofing is Critical
The decorative tile you see when you step into your shower is only the outermost layer of your bathroom's defense system. Beneath the grout and thinset lies the true hero of a wet room: the waterproofing membrane. Whether it is a sheet membrane system or a liquid-applied barrier, this layer is designed to function as a unified, continuous shield. Its entire purpose is to ensure that the hundreds of gallons of water hitting your shower walls each week flow down the drain rather than seeping into your home's structural framing.
When someone breaks through your shower tile to access a valve, they inevitably puncture and destroy a section of this continuous waterproofing membrane. Patching this area after the valve is replaced is notoriously difficult. The patched seam creates a weak point where moisture can easily penetrate unseen. In our years serving the damp Pacific Northwest climate of Maple Ridge BC, we have seen first-hand how hidden leaks from poorly patched tile lead to rapid, unseen mold growth inside the wall cavity. For this reason, securing expert plumbing services in Maple Ridge is essential to ensure your home remains structurally sound and mold-free.
The Hidden Dangers of Wall Cavity Moisture
Avoiding tile destruction is as much about protecting the home's structure as it is about saving money on tile replacement. When moisture breaches a compromised waterproofing patch, it soaks into the wooden studs and drywall behind the shower. Because this area is dark and lacks airflow, it becomes an ideal breeding ground for structural rot.
• Structural Integrity — Intact Original Waterproofing: Continuous, monolithic barrier with no weak seams. — Patched Waterproofing (Post-Demolition): Fragmented barrier relying on sealants that degrade over time.
• Moisture Resistance — Intact Original Waterproofing: Repels water entirely, directing it to the drain assembly. — Patched Waterproofing (Post-Demolition): High risk of micro-leaks behind the newly patched tile section.
• Mold Risk — Intact Original Waterproofing: Minimal, assuming grout and caulking are maintained. — Patched Waterproofing (Post-Demolition): High risk of unseen mold proliferation inside the wall cavity.
• Aesthetic Match — Intact Original Waterproofing: Perfect alignment and color consistency. — Patched Waterproofing (Post-Demolition): Often mismatched grout lines and slightly off-color replacement tiles.
The Rear-Access Strategy: Drywall vs. Custom Tile
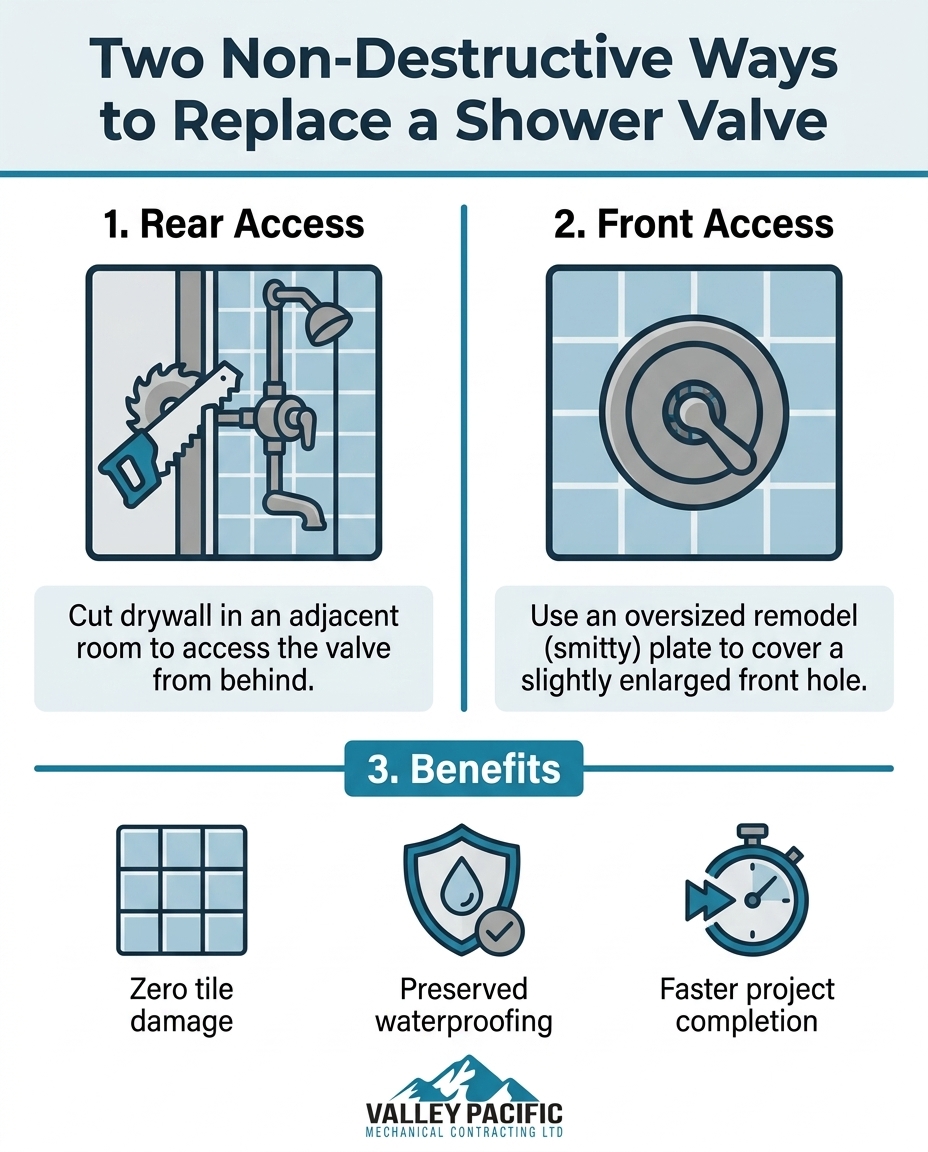
When evaluating how to tackle a failing shower valve, the preferred professional method our team recommends is almost always the rear-access strategy. Before our qualified technicians ever consider cutting into your shower tile, they evaluate the wall directly behind the shower plumbing. In many residential floor plans, the wet wall backs onto a closet, a hallway, or an adjacent bedroom. This layout presents a massive advantage for non-destructive plumbing repair.
The process involves carefully opening the drywall on the back side of the plumbing wall to expose the valve and pipe connections. Standard half-inch drywall is incredibly forgiving. It is inexpensive to cut, simple to patch, and easy to paint so that the repair becomes completely invisible. Contrast this with the near-impossibility of matching aged, custom shower tile, and the rear-access strategy becomes the obvious choice. Best of all, this method allows our technicians full access to the valve body without ever touching, cutting, or compromising the wet-area waterproofing membrane on the shower side.
When is Rear Access the Best Option?
While highly effective, rear access is not a universal solution. Our professionals always assess the home's specific architecture before proceeding.
• Ideal Scenarios: The strategy is perfect for interior walls where the backside is accessible drywall, such as a master closet or a hallway linen closet.
• Unsuitable Scenarios: This method cannot be used on exterior walls (due to structural sheathing, insulation, and siding) or when the shower backs directly onto another tiled wet room, such as a back-to-back bathroom layout.
• Access Panel Upgrades: Many homeowners choose to have us install a permanent, flush-mount plastic or metal access panel over the rear drywall cutout, making any future plumbing inspections or repairs completely effortless.
Front Access Using Remodel Plates (Smitty Plates)
When rear access is structurally impossible, our team pivots to safe, non-destructive front-access methods. This is where specialized hardware comes into play. The most common and effective solution is the use of a remodel plate, frequently referred to in the plumbing industry as a "smitty plate." A remodel plate functions as an oversized escutcheon—the decorative metal trim that sits behind your shower handle and rests against the tile.
If you are exploring a shower valve replacement guide, you will note that standard escutcheons are relatively small. A remodel plate is significantly larger, designed specifically to bridge the gap created when a technician needs to carefully enlarge the existing valve hole. By widening the hole just enough to extract the old brass valve body and solder in the new one, we avoid smashing the surrounding tile. Once the new valve is securely in place, the oversized remodel plate is installed, safely covering the enlarged opening and sealing watertight against the existing tile.
Our Front-Access Replacement Approach
Executing this method requires precision and patience. To protect your home, our professionals rely on specific, non-destructive techniques rather than standard demolition:
• Template Sizing: Our technicians measure the exact dimensions of the new remodel plate and create a template on the existing tile to ensure the enlarged hole will be completely covered.
• Precision Cutting: Using specialized diamond-grit oscillating tools, we carefully cut away the tile and backer board within the template lines, preventing cracks from spreading to the rest of the wall.
• Safe Valve Extraction: The old valve is properly disconnected and pulled through the newly created access window without damaging the surrounding structure.
• Flameless Valve Installation: The new valve is piped in, utilizing advanced flameless connection methods to ensure maximum safety inside the confined wall cavity.
• Watertight Sealing: The remodel plate is installed with a thick bead of high-grade plumbing sealant behind it, ensuring no water can bypass the plate and enter the wall.
Homeowners are often relieved to learn that modern remodel plates are not eyesores. They are manufactured by major plumbing brands and come in a wide variety of modern finishes—from brushed nickel to matte black—allowing them to match your new shower fixtures seamlessly.
Specialized Tools That Prevent Tile Damage
The difference between a destructive "smash and patch" job and a surgical valve replacement comes down to technical expertise and the right equipment. Extracting a bulky brass valve body through a minimal opening requires specialized pullers and inside-the-wall cutting tools that most DIYers and general handymen simply do not possess. When working within a tight, confined wall space, every millimeter matters.
One of the biggest challenges in non-destructive replacement is managing the pipe connections. Traditional soldering requires an open torch flame, which poses a massive fire hazard when used blindly inside a small wall cavity filled with old, dry wood framing. To mitigate this, our team at Valley Pacific Mechanical relies on advanced cold-press tools (like ProPress systems) that use immense hydraulic pressure to crimp copper fittings watertight without a single spark. We also use specialized expansion tools for PEX piping. By relying on these advanced methods for comprehensive residential plumbing solutions, we protect both your plumbing system and the surrounding bathroom finishes, saving you the cost, stress, and mess of extensive tile repair.
Why Precision Extraction Matters
Contractors who default to breaking tile often do so because they lack the specific tools required for precision extraction. Swinging a hammer is fast; carefully cutting a perfect circle through porcelain tile with a diamond bit takes time and skill.
• Cartridge Pullers: When only the internal cartridge is failing (rather than the entire brass body), specialized pullers can extract seized cartridges that have been calcified in place for decades, often saving the valve entirely.
• Oscillating Multi-Tools: Equipped with carbide or diamond-grit blades, these tools allow our technicians to cut exact geometries into the tile and backer board without vibrating the wall enough to crack adjacent tiles.
• Inspection Cameras: Borescope cameras can be slipped into the wall cavity to inspect the framing, check for hidden leaks, and verify the integrity of the new connections before the wall is sealed up.
Frequently Asked Questions About Shower Valve Replacements
Can a shower valve be replaced from the front?
Yes, a shower valve can absolutely be replaced from the front without tearing down the entire wall. Professionals achieve this by carefully enlarging the existing hole in the tile just enough to extract the old valve and install the new one. Once the new plumbing is secured, an oversized remodel plate (or smitty plate) is installed to cover the enlarged hole, providing a watertight seal and a clean, finished look.
Do I have to remove tile to replace a shower valve?
You do not necessarily have to remove or destroy your shower tile to replace a valve. If the wall behind your shower is accessible (such as a closet or bedroom drywall), a plumber can cut a rear access panel, replace the valve from behind, and easily patch the drywall afterward. If rear access is impossible, specialized front-access plates allow the valve to be swapped with minimal, hidden tile cutting.
What is a shower valve remodel plate?
A shower valve remodel plate is an oversized decorative metal trim piece designed to cover a larger-than-normal hole in your shower wall. When a plumber needs to widen the access hole to replace a valve from the front, standard trim plates are too small to cover the gap. The remodel plate bridges this space, sealing tightly against the tile to prevent water intrusion while matching your shower's aesthetic finish.
How much wall needs to be cut to replace a shower valve?
When using professional non-destructive methods, very little wall needs to be cut. For front access, the hole is typically enlarged to no more than 6 to 8 inches in diameter—just wide enough to extract the valve body, which is easily covered by a remodel plate. For rear access, a standard 12-inch by 12-inch square of drywall is usually removed from the adjacent room, which is simple to patch and paint.
Does rear wall access compromise shower waterproofing?
No, rear wall access is actually the best way to protect your shower's waterproofing. Because the technician cuts through the dry drywall on the opposite side of the plumbing wall, they never touch, puncture, or disturb the waterproof membrane located behind your shower tile. This ensures your wet area remains completely monolithic and secure against leaks.
Protect Your Bathroom's Integrity With Expert Care
The thought of replacing a shower valve without tearing down your bathroom wall might seem too good to be true when you are staring at a leaking fixture, but non-destructive replacement is entirely possible with the right expertise. By utilizing rear access panels through adjacent drywall or employing specialized smitty plates for front access, true professionals can swap out failing hardware while leaving your custom tile untouched. Preserving your bathroom's waterproofing and aesthetic finish should always be the priority. If you are facing a valve failure and want to avoid the mess and expense of unnecessary demolition, reach out to our team at Valley Pacific Mechanical. We have the specialized tools and techniques to handle the job with precision. Schedule a consultation today to discuss repair options that protect both your plumbing and your peace of mind.


