


The Truth About DIY Shower Valve Replacement in Mission Homes


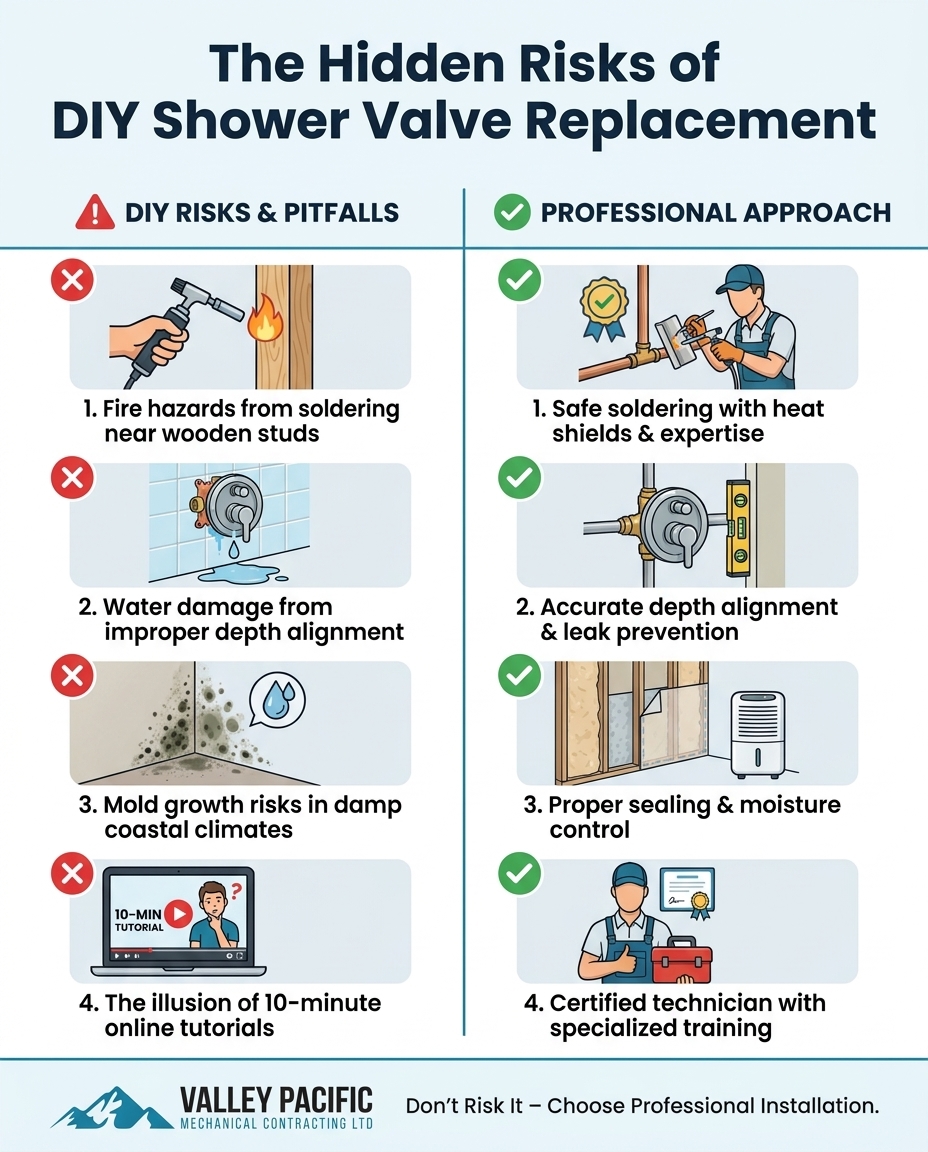
The 10-Minute Tutorial Illusion vs. Real-World Plumbing
A highly edited, ten-minute online video makes plumbing look incredibly simple, but the truth about DIY shower valve replacement in Mission homes is that these tutorials rarely show the catastrophic water damage that often follows a botched job. You watch a cheerful host pop off a handle, unscrew a plate, and seamlessly swap out a brass fixture. It looks like a breezy Saturday afternoon project that anyone with a basic wrench set can tackle. However, the reality of working inside a dark, confined wall cavity is far different from what a ring-lit studio demonstration portrays.
The concrete problem arises when well-meaning homeowners attempt to follow these generic tutorials and end up causing hidden, behind-the-wall leaks. The critical decision point usually hits when you are staring into a four-inch gap in your drywall, realizing the true complexity of soldering copper pipes and achieving the exact depth alignment required for the new fixture. At this moment, you must decide whether to risk unseen water damage that could rot your home's framing, or to rely on professional plumbing and mechanical services to ensure the system is sealed correctly.
Modern fixtures, particularly pressure-balancing shower valves, are highly engineered components. They are not simple plug-and-play devices. When you attempt to replace one yourself, you are taking on the role of a licensed mechanical contractor without the specialized tools, training, or insurance required to protect your property.
What the quick tutorials almost always edit out:
• Calcified connections: Old valves are often welded in place by years of hard water mineral buildup.
• Specialized pullers: Removing a stuck cartridge usually requires a dedicated mechanical puller that most DIYers do not own.
• System draining: Failing to properly isolate and drain the water lines leads to instant flooding the moment the old valve is cut.
• Blind working conditions: Real-world plumbing involves working entirely by feel inside a cramped, dusty wall cavity.
The Hidden Dangers of Soldering Inside a Confined Wall Cavity
The Problem: When replacing a traditional shower fixture, the existing copper pipes must be cut, and the new brass valve body must be soldered (sweated) into place. This requires heating the metal joints with a propane or MAPP gas blowtorch until they are hot enough to melt lead-free solder wire.
The Cause: The severe danger comes from the working environment. You are operating a blowtorch that burns at over 3,600 degrees Fahrenheit inside a dark, four-inch-deep wall cavity. This space is heavily populated with dry, combustible wooden studs, paper-backed drywall, and sometimes old insulation. A single slip of the torch, or a failure to use professional heat shielding, creates an immediate and severe fire hazard. Sparks or direct flame can ignite the dry wood inside the wall, starting a smoldering fire that you might not notice until it is too late.
The Solution: Professional plumbers utilize specialized heat shields, fire-resistant blankets, and rigorous safety protocols when working with open flames indoors. In many modern applications, they also have access to commercial-grade, cold-press joining tools that eliminate the need for a torch entirely—equipment that is far too expensive for a one-time DIY project.
The Anatomy of a Pinhole Leak
Even if you avoid scorching the wooden studs, improper soldering technique is a leading cause of slow, hidden pinhole leaks. Soldering copper requires perfectly clean, flux-coated pipes and exact temperature control. If the joint is too cold, the solder will not flow deeply into the fitting. If it is too hot, the flux burns away, and the solder beads up and falls off.
When a weak solder joint is suddenly subjected to standard municipal water pressure, it rarely bursts open all at once. Instead, it creates a microscopic pinhole leak. This weep releases a slow, continuous drip of water down the inside of the wall cavity every single time the shower is turned on. Because the leak is hidden behind the tile and drywall, it goes entirely unnoticed until significant structural damage has already occurred.
• Visibility — Workbench Soldering (Tutorials): 360-degree clear view of the pipe joint. — In-Wall Soldering (Reality): Working blind, often relying on a small mirror.
• Clearance — Workbench Soldering (Tutorials): Unlimited space to maneuver the torch. — In-Wall Soldering (Reality): Less than 4 inches of clearance from combustible wood.
• Moisture — Workbench Soldering (Tutorials): Pipes are completely dry and empty. — In-Wall Soldering (Reality): Residual water in the lines instantly cools the joint, ruining the solder.
• Gravity — Workbench Soldering (Tutorials): Pieces can be rotated for optimal solder flow. — In-Wall Soldering (Reality): Fixed vertical and horizontal pipes require advanced capillary action techniques.
Strict Depth Tolerances for Pressure-Balancing Shower Valves
If you manage to navigate the fire hazards and soldering challenges, the next hurdle is mechanical alignment. Pressure-balancing shower valves are designed to maintain a consistent water temperature by automatically adjusting the hot and cold water ratio if there is a sudden drop in pressure elsewhere in the house. Because of this complex internal mechanism, the physical body of the valve must be mounted at a highly specific depth within the wall.
Standard plumbing manufacturer installation guidelines mandate strict millimeter tolerances for how far the valve must protrude past the finished wall surface. This is where many DIY projects fail spectacularly, leading homeowners to eventually call for expert plumbing services to fix the resulting mess.
What happens if the valve is installed too deep?
If the brass body is set too far back into the wall cavity, the final decorative trim plate (the escutcheon) cannot reach the sealing surface. Without a tight, compressed seal against the tile or fiberglass, the waterproof barrier is broken. Every time someone takes a shower, water splashing against the wall will run freely behind the plate and directly into the wall cavity.
What happens if the valve is installed too shallow?
If the valve protrudes too far forward, the handle and trim plate will not sit flush against the wall. This leaves an ugly, visible gap between the metal plate and the tile. Worse, the handle mechanism becomes mechanically weak. The constant pushing and pulling on an unsupported handle will eventually stress the copper pipes behind the wall, leading to a cracked joint and a massive leak.
Signs of improper depth alignment include:
• A trim plate that wobbles or spins loosely against the tile.
• Visible gaps where caulking has been heavily applied to hide a poor fit.
• A shower handle that feels spongy or difficult to turn.
• Unexplained water stains on the ceiling of the room directly below the bathroom.
The Reality of Unseen Water Damage in Coastal Climates
The technical failures of a botched plumbing job are bad enough on their own, but they become catastrophic when combined with the local environment. Mission and Maple Ridge homes face unique challenges due to the Lower Mainland's high annual precipitation and persistent humidity levels. With damp, wet weather year-round, the climate is highly unforgiving to indoor moisture problems.
When a wall cavity traps moisture from a poorly soldered joint or a leaking trim plate, that space cannot dry out naturally. The ambient humidity in the region prevents rapid evaporation. Instead, the dark, stagnant, and damp environment inside the wall becomes the perfect breeding ground for rapid mold proliferation and structural rot.
Homeowners across our local service areas including Mission often do not realize a leak exists until the damage is extensive. By the time you notice a musty smell, peeling paint on the adjacent hallway wall, or soft, spongy baseboards, the rot has likely spread into the structural framing of the house. The resulting remediation requires tearing out the entire shower surround, replacing the rotted wooden studs, treating the mold, and rebuilding the bathroom from scratch.
Insurance industry realities regarding residential water damage are also sobering. Many homeowner insurance policies include clauses regarding damage caused by unpermitted or improper DIY plumbing work. If an insurance adjuster determines that a catastrophic leak was caused by an incorrectly installed fixture that did not meet building codes, the resulting claim for water damage and mold remediation could be denied, leaving the homeowner responsible for the entire restoration bill.
Accessing the Plumbing: Cutting Drywall vs. Fiberglass
One of the most common questions homeowners have when researching this project is how to actually reach the pipes. The reality of accessing the plumbing system is often much more destructive than online videos suggest.
Can you replace a shower valve without cutting the wall?
The short answer is usually no. Unless your home was built with a dedicated rear access panel in the closet or hallway directly behind the shower, you must cut into the wall to reach the plumbing. While some minor cartridge repairs can be done from the front by removing the handle, completely replacing the brass body requires significant physical access to cut and join the copper pipes.
What are the risks of cutting fiberglass surrounds?
If you do not have rear drywall access, you are forced to cut through the front of the shower surround. Cutting into standard drywall is relatively straightforward to patch and paint later. Cutting into a molded fiberglass or acrylic shower unit is incredibly risky. Fiberglass is brittle and unforgiving. If you crack the surround while trying to enlarge the access hole, or if your saw slips, the waterproofing is permanently compromised. You cannot simply patch a cracked fiberglass shower pan or wall; the entire unit often needs to be replaced.
How do oversized escutcheon plates work?
If you must cut a large hole in the tile or fiberglass from the front, professionals sometimes use an oversized escutcheon plate, commonly called a "smitty plate," to cover the expanded access hole. While these plates are useful, they require exact precision. The plate must be perfectly centered, properly gasketed, and flawlessly caulked to prevent water intrusion. If a DIYer installs a smitty plate slightly off-center when replacing a shower valve, the resulting gap will funnel shower water straight into the wall cavity.
The challenge of specialized pullers
Even if you are only trying to replace the internal cartridge rather than the whole brass body, access remains a problem. Old cartridges fuse to the brass housing over time due to mineral deposits from the water supply. Pulling them out requires a specialized mechanical extraction tool. Homeowners who try to force a stuck cartridge out with standard pliers frequently snap the plastic stem off inside the housing, turning a simple repair into an emergency full-valve replacement.
Why Code-Compliant Professional Installation Outweighs DIY Savings
When you weigh the severe risks of fire, hidden mold, structural rot, and voided insurance claims against the perceived savings of doing the work yourself, the math simply does not add up. The hidden costs of DIY mistakes are almost always exponentially higher than the cost of doing the job right the first time.
Choosing Valley Pacific Mechanical's professional, code-compliant plumbing expertise protects you from these catastrophic outcomes. Certified mechanical contractors carry the right tools, the correct heat-shielding equipment, and the exact knowledge required to protect your home. A professional installation guarantees that the depth alignment is perfect for trim seals, the soldering is flawless and leak-free, and the entire system is pressure-tested before the wall is ever closed up.
A typical pattern we see in professional service highlights the value of relying on experts. For example, during a recent winter plumbing installation project, a home required extensive pipework upgrades in challenging conditions. By partnering with a reliable professional team that met strict project schedules, the installation delivered perfect, leak-free results, providing the household with complete peace of mind despite the complex requirements.
This is the standard of care required for in-wall plumbing. It is not a place for guesswork. Relying on professional residential mechanical services ensures that the structural integrity of your home remains intact and that your family is protected from the health hazards of hidden mold growth.
Making the Right Call for Your Home's Plumbing System
While taking on home improvement projects can be incredibly rewarding for tasks like painting a bedroom or updating landscaping, in-wall plumbing carries risks that are simply too high for amateur tutorials. The truth about DIY shower valve replacement in Mission homes is that the margin for error is virtually zero. A single poorly soldered joint or a millimeter of incorrect depth alignment can lead to devastating consequences for your property.
We encourage you to prioritize your home's safety, structural integrity, and your own peace of mind over perceived short-term savings. If you suspect your current fixture is failing, leaking, or struggling to maintain temperature, do not risk opening up the wall yourself. Reach out to a licensed professional to assess the situation, ensuring the job is done safely, correctly, and completely up to code.
Frequently Asked Questions
Can I replace a shower valve myself?
While it is technically possible for a highly experienced DIYer to replace a shower valve, it is strongly discouraged due to the severe risks involved. The process requires cutting into walls, operating a blowtorch near combustible framing, and achieving exact millimeter depth alignment. A single mistake in soldering or positioning will lead to hidden water damage, structural rot, and potentially voided homeowner insurance claims. It is a complex job that requires the expertise and specialized tools of a licensed professional.
How hard is it to replace a shower valve?
Replacing a shower valve is considered a highly difficult plumbing task that goes far beyond basic maintenance. It involves isolating and draining the water supply, cutting out the old brass body, and sweating new copper pipe joints in a very tight, dark wall cavity. Furthermore, the new valve must be mounted at a highly specific depth to ensure the final decorative trim seals properly against the wall. Because of these strict tolerances and fire hazards, it is one of the hardest residential plumbing tasks to get right.
Can you replace a shower valve without cutting the wall?
In most cases, you cannot replace the entire brass valve body without cutting into the wall. If your home has a dedicated rear access panel in the room behind the bathroom, the job can be done without damaging the shower tile or fiberglass. However, without rear access, a plumber must carefully cut an access hole through the front of the shower surround. This hole is later covered by an oversized, specialized escutcheon plate to restore the waterproof barrier.
What happens if a shower valve is installed too deep?
If the brass valve body is mounted too far back into the wall cavity, the decorative trim plate will not be able to reach the wall surface to create a seal. This leaves a gap between the plate and the tile or fiberglass. Every time the shower is used, splashing water will run through this gap and pour directly into the wall cavity, leading to rapid mold growth and structural rot behind the scenes.
What are the signs of a bad shower valve?
The most common signs of a failing shower valve include a showerhead that constantly drips even when the handle is turned completely off, or a handle that feels stiff, spongy, or difficult to turn. You may also experience sudden, extreme temperature fluctuations when water is used elsewhere in the house. In severe cases, you might notice unexplained water stains on the ceiling directly below the bathroom, indicating the valve is leaking behind the wall.
How do pressure-balancing shower valves prevent scalding?
Pressure-balancing shower valves use an internal spool or diaphragm mechanism to constantly monitor the ratio of hot and cold water pressure entering the fixture. If someone flushes a toilet or turns on a washing machine, causing the cold water pressure to drop suddenly, the valve instantly shifts to reduce the hot water flow by the exact same amount. This automatic balancing act prevents sudden spikes in temperature, protecting the user from dangerous scalding.


